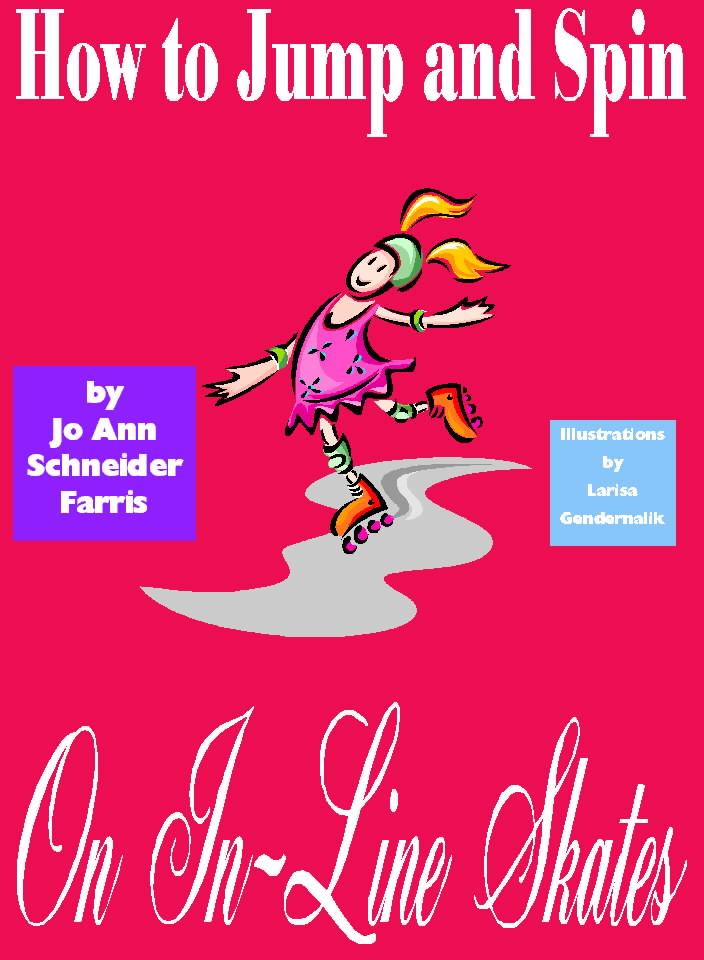
How to Jump and Spin on In-Line Skates

By Jo Ann Schneider Farris
With Additional Material by Marion Ennis Curtis
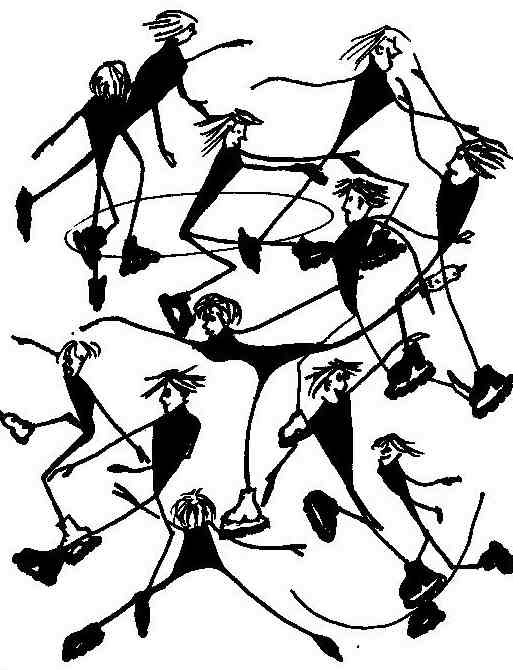
Illustrations by Larisa Gendernalik
Copyright 2000, Jo Ann Schneider Farris
All rights reserved
No part of this book may be reproduced, stored
in a retrieval system, or transmitted by any means, electronic, mechanical,
photocopying, recording, or otherwise, without the written permission from
the author.
ISBN # 1-58721-052-5
This book is dedicated to my parents. Thank you for giving me skating.
Thank you for encouraging me. Thank you for loving me.
Acknowledgements

I would like to thank the following people who helped with this writing:
roller skating coaches Larry Bishop and Stacey Lavender, who both encouraged
me to try moves I did not think were possible on in-line skates and helped
me to understand more about roller skating; Shirley, David, Shane, Sarina,
and Melissa Hayden and Frankie Bishop, owners/managers of Bosanova Roller
Skating Center in Colorado Springs who made me feel so welcome at their
facility; ice skating coach and colleague Larisa Gendernalik who encouraged
me and illustrated most of this project; (Larisa wants me to mention that
at the time she began jumping and spinning on in-lines, she was 44 years
old so remember, you are never too old to jump and spin on in-line skates!);
Chelsee and Michelle Foster, who took the time to allow me to take photos
of Chelsee; skater Nathalie Biedermann and photographer Eric Maurer of
Visiomatics (www.skatetrix.ch)for
giving me permission to share their wonderful photos of Nathalie;my editors
Bruce Curtis and Susan Grimm for their time and dedication to detail,and
my lifelong friend, Marion Ennis Curtis, for her support and encouragement.
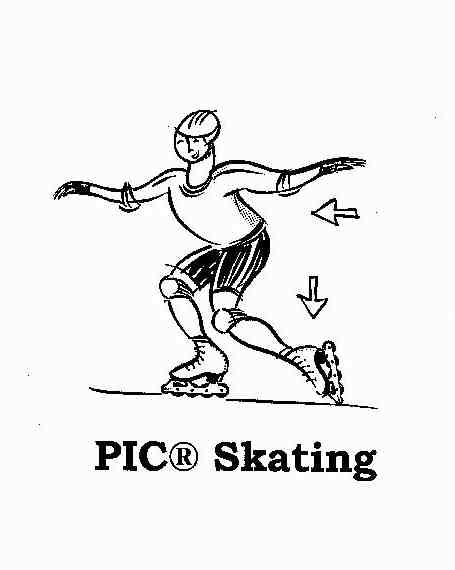
Id also like to thank Harmony Sports, John Petell and Nick Perna for inventing
the PIC® Frame Skate!
Why Jump and Spin on In-Line Skates?
You may be already be cynically thinking; Yeah, sure; like Im going
to be able to get out there and perform advanced maneuvers right.
And, after all, what is the attraction here? Why even bother to learn jumps
and spins on in-line skates? The simple answer is pure enjoyment; you will
actually learn to do these moves! Actually, there are a great many reasons,
but to list them here would be next to impossible. More to the point is
that while jumping and spinning is really quite easy on ice skates, these
beautiful and classic maneuvers dont come quite as naturally on in-line
skates. Then why tackle these maneuvers? Thats an easier question to answer.
If you are an ice skater or artistic roller skater, there is something
compelling about the refined dynamics designed into modern in-line skates.
Put them on and they just naturally give you the urge to jump and spin,
perform turns, dances, footwork, and more. Of course, the urge to do these
moves can be limited by the fact youre on wheels instead of blades. While
that can seem like a real frustration, the good news is that if you have
the desire and the time, youll find that just a little effort re-creating
those classic ice moves can be marvelously rewarding and challenging. What
if you are not an accomplished ice skater or artistic roller skater?
Dont worry about it; youll find that learning to jump and spin is just
adding another satisfying dimension to in-line skating. Just take a moment
to paint a mental picture: Can you imagine yourself gliding out to the
center of the rink, performing a perfect one-foot spin, and seeing the
look on the faces of those who watch? The surprise alone is worth it; you
would be amazed how many ice skaters and quad roller skaters have never
even been near in-line skates. When they get a look at what is possible,
theyre bound to be impressed! Although its a kick to impress spectators,
keep in mind, the main thing is simply to go out there and have fun!
You may even detect a large enough streak of talent to get you thinking
about entering in-line skate competitions. USA Roller Skating holds
a number of such events throughout the U.S., and in-line competitions have
even found their way into the big time; several events are now formally
held at the Roller Skating World Championships. If you want more information
about these meets, Ive provided the address of the USA Roller Skating
Association at the end of this book. You can also check with your local
roller rink the folks there will be able to tell you about their own
artistic skating programs or club, and thats one of the best ways to find
out about competitive events in your local area.
Note: Ive made the assumption here that you are already comfortable
on in-line skates; that is, you can stroke, stop, go backward, and glide
on one foot. If you are not quite there yet, dont worry, there are excellent
books available to help you get started. Can you tackle it? Sure, and youll
have a lot of fun building up your skill level. Harmony Sports, makers
of the PIC® Frame in-line figure skate, has an excellent manual
on the basics of in-line skating. Thats the type of skate I personally
train on and teach with, so I especially recommend their manual to those
of you who consider yourselves absolute beginners who simply want to learn
the basics. The manual is also a component of an exciting new training
system called the GYM SKATE program that can be used at school campuses,
in case you dont have a roller rink nearby. The GYM SKATE program was
developed by Harmony Sports to interest more skaters in in-line skating,
and Ill have a special section with details on it at the end of this book.

Another excellent resource is Get Rolling: the Beginner's Guide to
In-Line Skating by Liz Miller. There is also an excellent web site
related to this publication that will help all in-line skaters: Liz Millers
Get Rolling In-Line Skating Web Site. It can be found at http://www.getrolling.com.
Youll also notice that I often refer to classic skating terms, such
as, outside edge, free foot, etc. If some of these sound like Greek
to you, get a copy of the United States Figure Skating Association Rulebook.
Some
other reference sources are Ice Skating, Steps to Success by Karin
Kunzie-Watson or Ice Skating Basics by Aaron Foeste for a complete
explanation. Roller Skating Associations also have similar manuals. Also,
at the end of this writing, youll find a short glossary of basic skating
termsso dont feel bashful about taking a peek back there whenever you
run into a term or expression you dont recognize.
Youll also notice that Ive designed the training methods to utilize
"toe-pick" skate-oriented in-line skating, meaning youll probably want
to consider the purchase of a skate which features the rubber toe stop,
or toe pick, mounted on the front of the skate. In fact, you probably
wont be able to perform many of the moves I describe without one. You
may already have realized that most street style in-line skates have a
rubber stop or brake at the rear of the skate, so how can you skate these
moves on the pair you now own? First, many of the moves I describe can
be attempted without a toe pick, but remember, you really do need skates
equipped with toe picks to do most of these moves properly. In the next
section, Ill help you get familiar with specific types and brands of skates
available for performing the jumps, spins, and other maneuvers youll learn.
|
Heres a suggestion:
If you want to try some of the moves described here that do require
a toe pick, but dont want to purchase a skate especially with a toe pick,
do the following:
Remove your front wheel and replace with a PIC® or with a
wheel that does not move. Then, you should be able to at least try the
moves that require a toe pick.
|
What kind of skates do I need?
(Buy the book How
to Jump and Spin on In-Line Skates to read this chapter.)
Ready to begin!
Ill start you off with some moves that will get you
up and moving like a pro, right away:
Pivots

Pivots are a fun and easy way to get you feeling in-control! Just place
the PIC® into the floor for a forward inside pivot, push with
the other foot, and skate around your toe. Make a complete circle around
the stationary toe. To do a back inside pivot, simply reverse the procedure.
This move will make you feel like an expert skater almost immediately!
Back Outside Pivot
(Buy the book How
to Jump and Spin on In-Line Skates to read this chapter.)
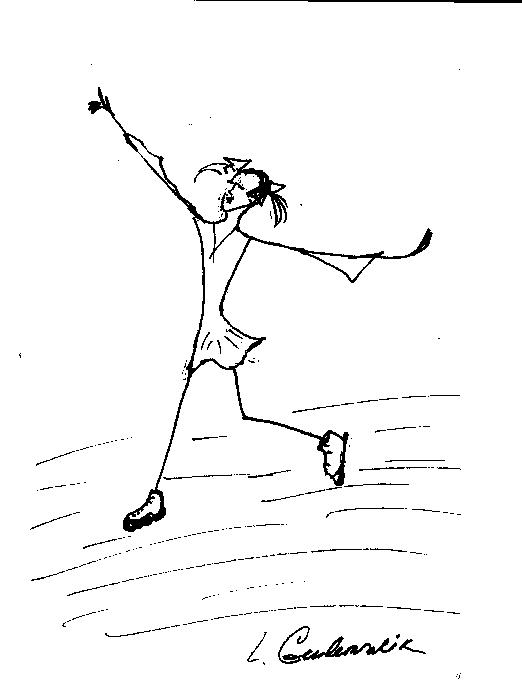
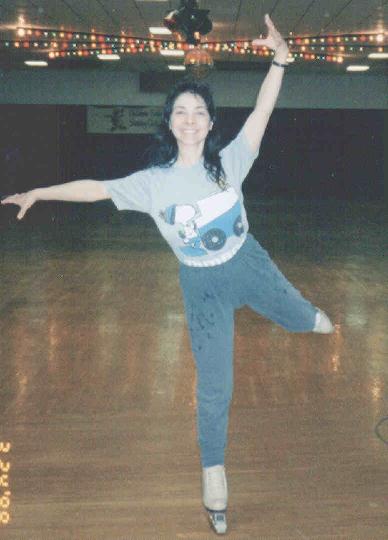
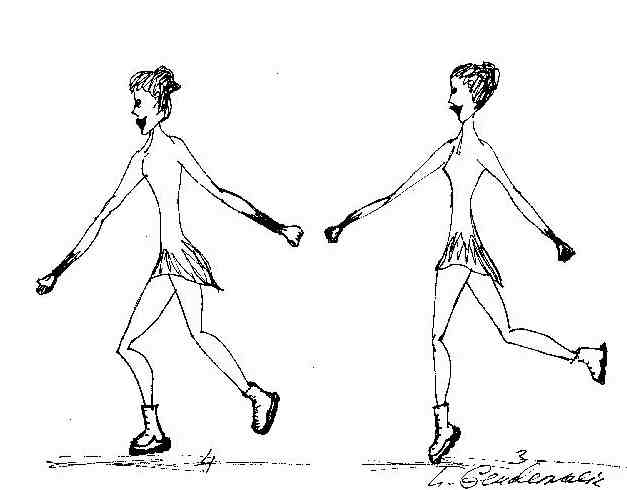
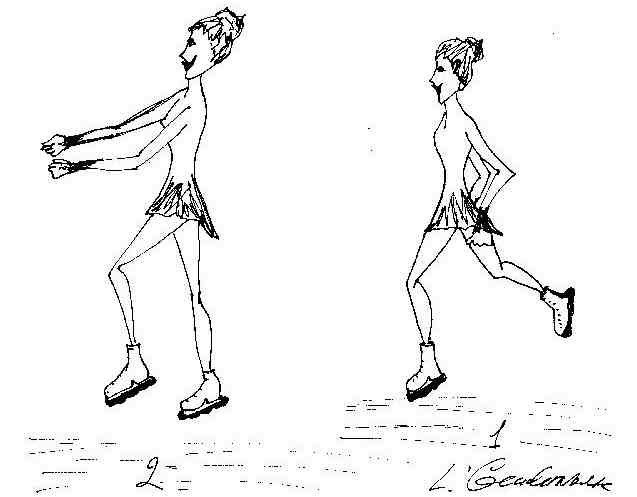
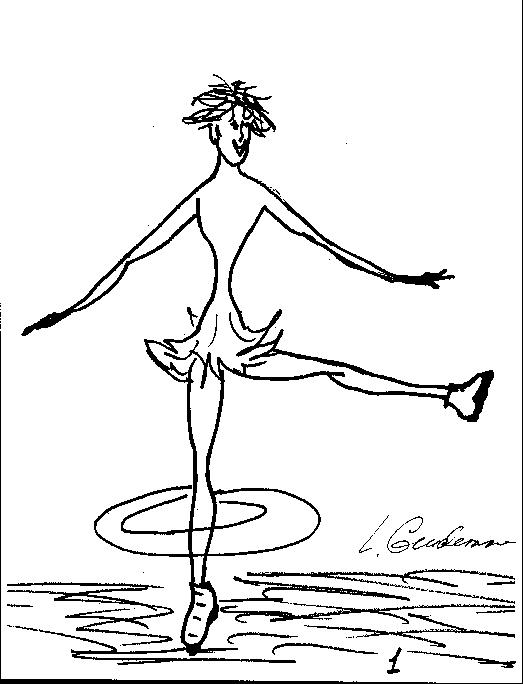
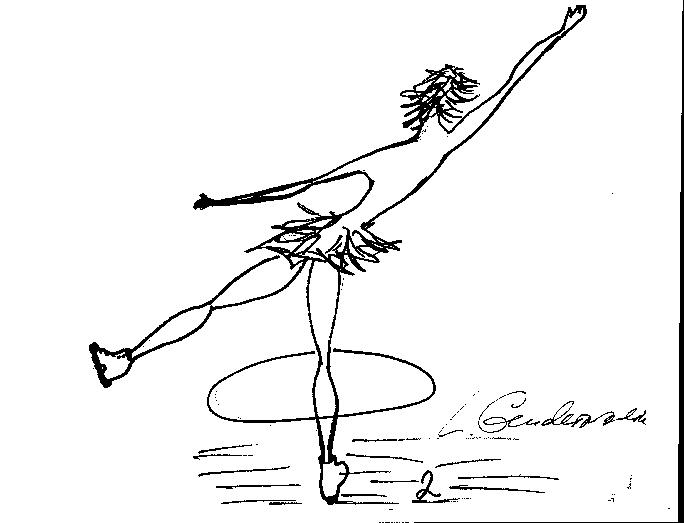
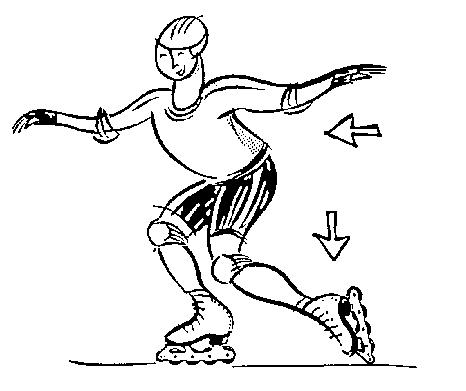
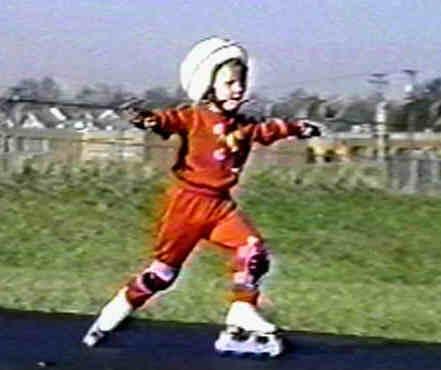
Attitudes
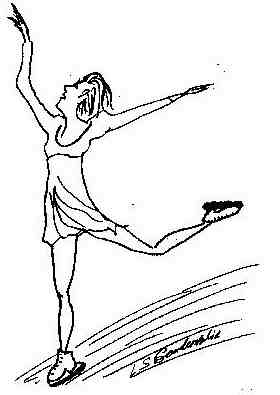
Attitudes are in that category of easy, pleasing moves that only appear
difficult. Start off with a one-footed glide, stretching your free leg
behind. Bend your free leg slightly, and put one arm up above your head
and one arm out to the side. Make sure your free thigh is raised and turned
outward. Keep your head up throughout. Next try the same body attitude,
going backward. Finally, change feet and do the same move in the reverse
direction.
Spirals
(Buy the book How
to Jump and Spin on In-Line Skates to read this chapter.)
Lunges
(Buy the book How
to Jump and Spin on In-Line Skates to read this chapter.)
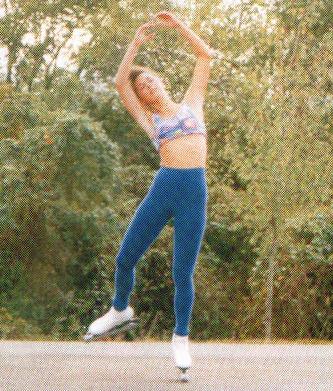
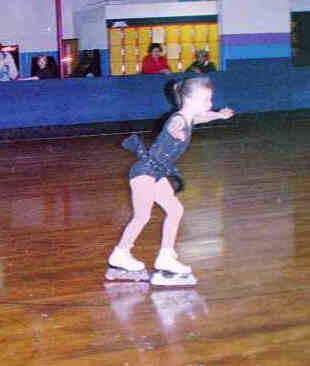
Shoot the Duck
Bend both knees completely and squat down as far as you can go while
moving as fast as you can in a straight line. Then place your right hand
under your right calf and your left hand on your left knee and stick your
right leg forward. This isnt the suicide maneuver you may be picturing,
because if you fall, its no big deal since you are already almost on the
floor! If you dont fall, just bring your right leg back down next to your
left one and skate in the dip position again and then stand up. Wasnt
that fun? When you have complete control of the entry and exit, then you
can try to perform the shoot the duck, bending down on one leg, with the
other extended forward. If you have really good knee control, you can work
up to getting up on one leg as well (assuming you are not like some of
us in the over-40 crowd, whose knees complain whenever we
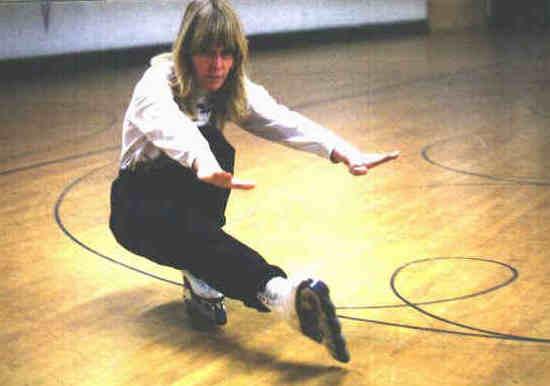
attempt those under-20 moves!). Another, more difficult way to perform
this maneuver is to add the element shown in the photograph above: Extend
both arms in front of you throughout the move. Youll be on your way to
achieving that "Olympic" look. By the way, the real wild and crazy skaters
will actually do this going backward.
Spread Eagle
(Buy the book How
to Jump and Spin on In-Line Skates to read this chapter.)
Bauers
(Buy the book How
to Jump and Spin on In-Line Skates to read this chapter.)
|
Im inserting a special section on doing spread eagles and Bauers
written by my friend Marion Ennis Curtis. She is an expert on doing these
moves. Enjoy!
|
Spread Eagles and Bauers
by Marion Ennis Curtis
(Buy the book How
to Jump and Spin on In-Line Skates to read this chapter.)
How to Spin
Here is one move that is hindered somewhat by the limitations of a wheel
skate. Learning to spin on in-line skates is not easy! Spinning on the
ice is actually much simpler, to tell you the truth. On an in-line skate,
it is essential to get up on the front wheels to be able to perform a decent
spin. If you practice what I describe below, you should be able to perform
this maneuver.
-
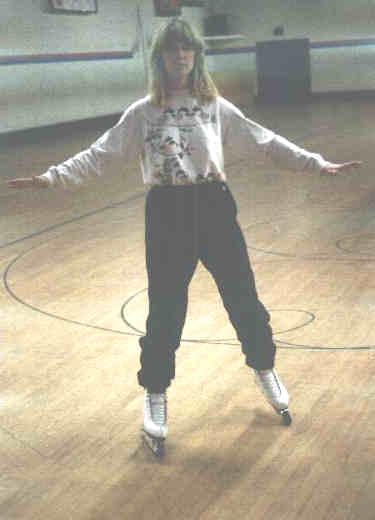
The easiest way to start is with a 2-foot spin. If you spin to the left,
try to get the feeling of spinning forward on your right skate and backward
on your left skate: It will feel like you are doing a forward swizzle and
a backward swizzle at the same time. The right skate should have most of
the weight on the heel, while the left skate should have most of the weight
on the toe.
|
At the outset, I mentioned that most moves such as this require
a skate with a toe pick, but youll discover that a two foot spin can be
performed in regular in-line skatesin fact, it is probably easier. Balance
is crucial here. Keep your weight distributed right in the middle; that
is, keep your weight right between your left and right legs. The right
skates weight should be on the heel, while the left skates weight should
be on the toe.
|
-
When you reach the point where you know you are skating backward on the
left inside edge, lift up the right foot. Stay forward over the left skate,
and you will find yourself making a small back inside circle, and you should
be spinning on one foot! The conventional wisdom says that attempting a
one-foot spin on in-line skates is courting disaster, but here is where
a pick-type in-line skate makes things interesting; these moves are cutting-edge
at the moment, so you might as well give them a try. Then you can bask
in the glow, knowing you are a true pioneer in this sport!
-
After you have mastered this technique, try entering the spin on a forward
left outside edge. To make this work well, you really need to enter the
spin with considerable force, after which, you throw your left arm around
hard and pivot up to the front wheels at the same time; that should put
you into a successful, centered one-foot spin. At this point youll have
the sense you are actually doing a very deep left outside forward three
turn. The trick now is to bend down quite low on the left knee, which actually
helps center the spin. Your free leg has to follow the curve; think of
it as a tetherball swinging around the pole on its string.
-
(This next step will really help firm up those tummy muscles; its better
than Richard Simmons.) Hold your stomach in hard, and remain over the front
of the skate; then pull your free leg into your knee while you raise up
a bit on the skating knee. If all goes well and you remain balanced, youll
now begin to pull your arms into your chest. Dont forget to keep your
elbows up!
-
To exit, pull out backward on a nice back right outside edge by making
a swizzle with your left foot and transferring your weight over to your
back right outside edge. Turn out and stretch your free leg, and hold the
edge, keeping your head up. Youll need to push hard as you exit the spin.
Youve probably noticed that you are feeling pretty dizzy right about now.
To prevent vertigo, focus on a stationary object, like the high price of
Milk Duds on the snack bar sign.
-
Heres a bit of an add-on to give you some extra style. Try the spin from
clockwise back crossovers or from a tight turning, sharp right back outside
edge. I have found that the entry from the sharp back outside edge a bit
easier than the traditional back crossover entry that is done on the ice.
Sit Spin
(Buy the book How
to Jump and Spin on In-Line Skates to read this chapter.)
Scratch Spin
(Buy the book How
to Jump and Spin on In-Line Skates to read this chapter.)
Camel Spin
(Buy the book How
to Jump and Spin on In-Line Skates to read this chapter.)
Change Camel Spin
(Buy the book How
to Jump and Spin on In-Line Skates to read this chapter.)
Change-Foot Sit Spin
(Buy the book How
to Jump and Spin on In-Line Skates to read this chapter.)
Traveling Camel Spin
(Buy the book How
to Jump and Spin on In-Line Skates to read this chapter.)
Traveling Back Camel
Spin
(Buy the book How
to Jump and Spin on In-Line Skates to read this chapter.)
Camel Spin into a Sit Spin
(Buy the book How
to Jump and Spin on In-Line Skates to read this chapter.)
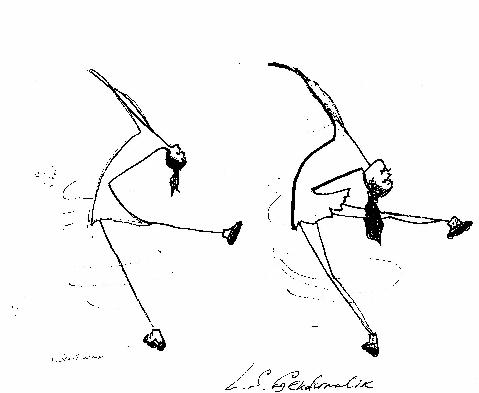
Layback Spins and Attitude Spins
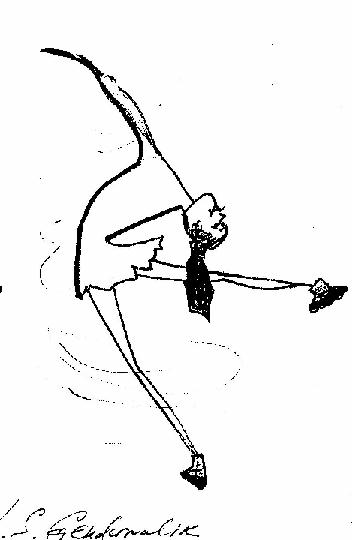
Take a breather here, because these will be a piece of cake by now.
Enter the spin on a very bent knee, and lean way forward over the skate
pick. Bend your free leg into the attitude position, and if all is
still forward enough, pull your head back. First do it for only one revolution,
and as you gain confidence, hold the spin longer. Arm positions are optional.
| An attitude position is where the free leg is opened and turned
out. Dont feel embarrassed, even if you think you look like a doggy encountering
a fire hydrant, because thats probably the best description of how this
should look when done correctly. |
Elementary Jumping Techniques
Back in the old days, jumps were rarely done, and when skaters did perform
them, they were seen as frills; today the frills are gone and jumps have
been integrated into the very fabric of competitive skating. Since 1948,
when Dick Button performed the first double-Axel in Olympic figure skating
to become the first American in mens competition to earn gold, winning
has been impossible without jumps--and with good reason. As a skater leaves
the ground, the audience is frozen in awed suspense, wondering whether
he will touch down lightly or crash and burn. Its high drama, but artistic
roller skaters had to await the in-line revolution before they could match
the beauty of ice-rink quality multi-jumps. Today, with all the great equipment
available to skaters, high and exciting jumps are easier to perform than
you might thinkand lets face it, theyre the favorite of fans.
Waltz Jump
(Buy the book How
to Jump and Spin on In-Line Skates to read this chapter.)
Bunny Hop
The bunny hop is an elementary maneuver that almost anyone at any age
can do. The nice thing about doing these is that they feel something like
a jump, so theyre a great way to work through your natural fear of jumping.
Start off skating in a straight line on a left forward outside edge, but
heads up for the foot change. Swing your free foot forward, leap forward
toward your right leg, place the right toe on the floor, and then change
feet by pushing out forward on your left forward outside edge.
Ballet Jump
Youll next learn the ballet jump, starting from a standstill. Place
the left toe into the floor, jump from it with your left arm extended up,
and then land on the left toe again. Lastly, change feet and glide forward
to exit on your right inside edge.
After youve mastered this jump from a standstill, youll be ready to do
one while moving, entering from a right back outside edge. Go easy on the
momentum here, please; crashes from this position can be rather painful!
Tap Toe Jump and Mazurka Jump
(Buy the book How
to Jump and Spin on In-Line Skates to read this chapter.)
Salchow
(Buy the book How
to Jump and Spin on In-Line Skates to read this chapter.)
Toe Loop or Mapes Jump
(Buy the book How
to Jump and Spin on In-Line Skates to read this chapter.)
Toe Walley
(Buy the book How
to Jump and Spin on In-Line Skates to read this chapter.)
Loop Jump
By now, you are probably itching to try your first full-revolution jump,
and that means a loop jump. Full-turn jumps are the latest trend on in-line
skates, guaranteed to impress, and youll be doing them backward,
to boot! The critical thing to remember here is that you dont want your
skate to slip out from underneath you. Thats why youll enter this jump
from a very straight back outside edge. Dont let your skate edge curve
as you jump; instead, use your left shoulder to help you rotate. (Your
goal here is to rotate counterclockwise through 360 degrees in the air.)
Again, I want to emphasize the importance of balance; stay forward over
the front wheels. It is best to keep your free leg in front throughout
so that you land in exactly the position you were in before jumping. I
know it seems like a lot to remember, but be sure to keep your arms in
control, not letting them get over your head. Once you've landed, pull
out exactly as you would from a spin.
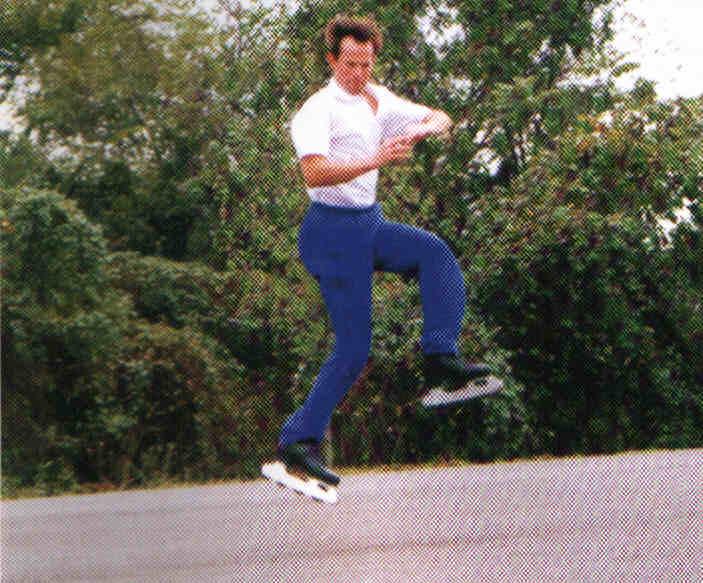
The Walley
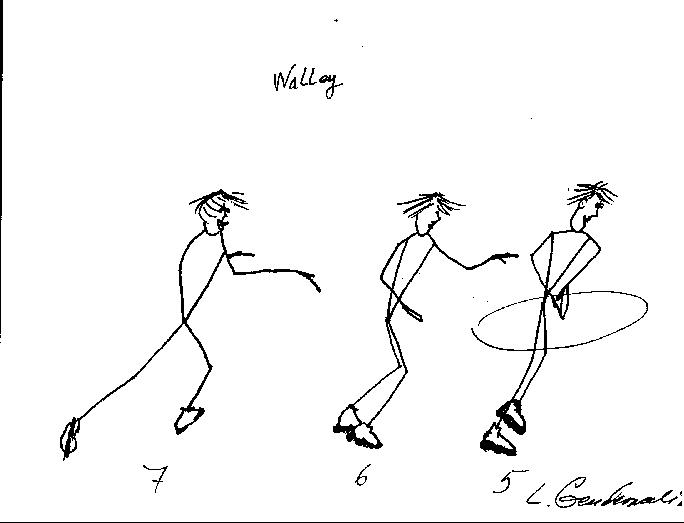
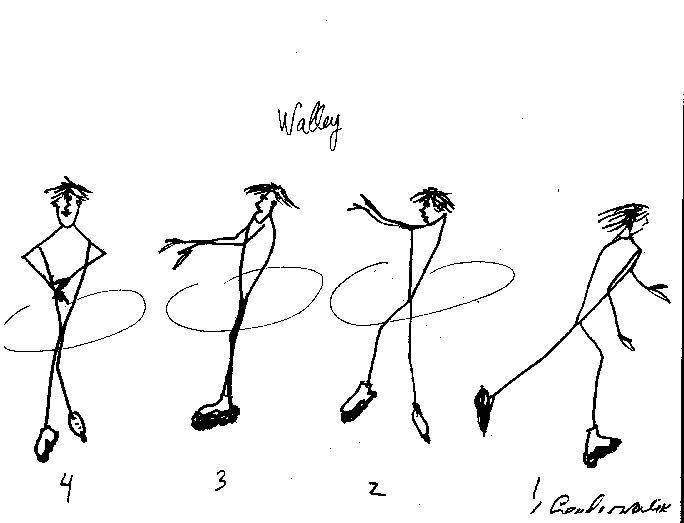
As soon as youre ready to raise the level of difficulty a notch, the
Walley is your next jump. The Walley is similar to a loop jump, but with
a back inside edge takeoff. Try it at the rail first: Stand on a back inside
edge; then, instead of leaving your free leg in front, bring the free foot
right next to the skating foot and lift it up slightly. Now jump 360 degrees
counterclockwise in the air. Land on a back outside edge, exactly as in
a loop jump, waltz jump, or Salchow.
Ready to move away from the rail for the real thing? Try doing an edge
pull, that is, a back outside edge that pulls into a back inside
edge. This move takes some practice and requires bending the skating knee
hard, rising as the edge makes the transition, and then bending again.
Bring the free foot into the skating foot, jump a full revolution in the
air (toward the free foot), and then land on a back outside edge, skating
knee bent, free foot extended back. Keep your hips and shoulders level
throughout the move. You can also enter a Walley from a three turn, then
a back inside wide-step, exactly the same as a toe Walley, but dont use
your toe. This entry may be easier for you than the edge pull Ive described
above.
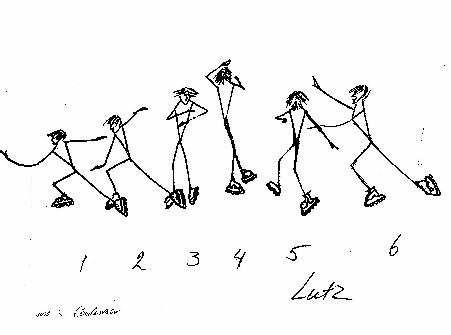
Flip Jump and Lutz
The flip jump and Lutz are very impressive full-revolution jumps because
your feet move like lightning due to the pole-vaulting effect the toe pick
gives. Its easiest to progress toward these jumps in stages. Begin by
doing half flips and half Lutzes to build your PIC® or toe stop
skills. Dont rush; start out slowly.
Half flip: To do a half flip, enter with
either a left outside three turn or a right mohawk so you are going backward
on a left inside edge. "Pick" with the right toe, jump counterclockwise
a half revolution, land on the left toe, and exit on the right forward
inside edge. To finish: Make sure you do the jump in a straight line. As
you land, continue in the straight line, gliding forward in a "checked"
position, with the left arm in front and the right arm in back.
Half Lutz: Begin this jump clockwise,
entering from back crossovers. The key here is to take off on an outside
edge instead of an inside edge, but spring up on your PIC® and
perform the jump exactly as you would a half flip. If you do it right,
youll trace an "S" pattern on the floor.
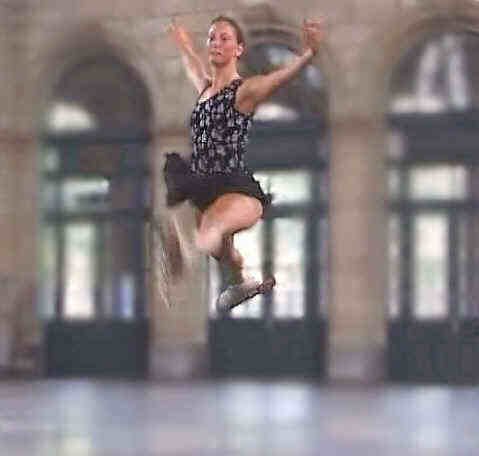
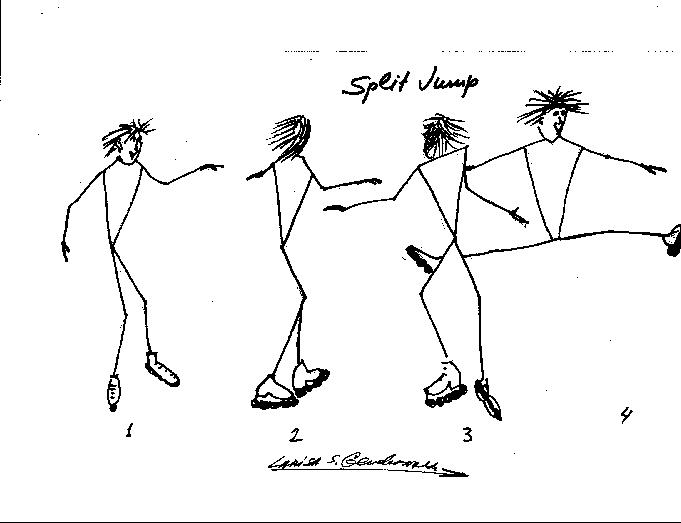
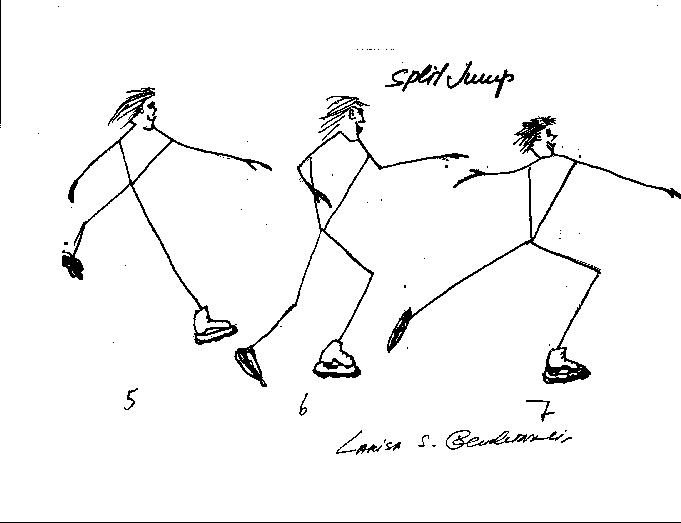
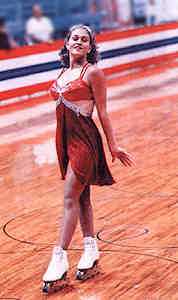
Split Jump
Photo courtesy of skater Nathalie
Biedermann and photographer Eric Maurer of Visiomatics (www.skatetrix.ch)
Before you go full-bore into a 360 degree flip jump or Lutz, you may
feel more comfortable practicing two more transition jumps, the split
jump and split Lutz. These should feel
familiar already, because theyre the same as the half jumps, except that
youll scissor-split your legs by leaping forward in a scissoring motion.
These jumps have that wonderful quality of being relatively easy, while
spectacular to watch! After you "pick" with the right toe, turn and leap
towards your left leg, land on the left toe, and push out forward on the
right inside edge. Keep at it until you are confident: then you can move
on to the full jumps.
You should definitely begin learning to perform the flip and Lutz slowly
and carefully. There is some risk of toe pick slippage, Ive noticed, so
when you notice significant wear on your PIC®, its crucial
to adjust or rotate it for proper floor contact. Enter these jumps just
as you entered the half flip or half Lutz, but add rotation to achieve
a full revolution in the air.
Land on your right back outside edge on a soft slightly bent knee with
your free leg stretched and arms extended out. While you are still in the
air, your arms should be pulled in close to your chest. When doing the
full Lutz, Ive noticed that you dont need to bend down quite as hard
in preparation as you would on ice.
We have now advanced by degree of skill through
the major jumps, but thats not the end of the story. Think of jumps as
elements which can themselves be combined into artistic routines in an
overall competitive program. Marion Curtis has some excellent ideas for
this:
Style Strategies: Combining Jumps and Moves
by Marion Ennis Curtis
(Buy the book How
to Jump and Spin on In-Line Skates to read this chapter.)
Jump Combinations
(Buy the book How
to Jump and Spin on In-Line Skates to read this chapter.)
Falling Leaf Jump and Half
Loop Jump or Euler Jump
(Buy the book How
to Jump and Spin on In-Line Skates to read this chapter.)
Inside Axel or Boekel Jump
(Buy the book How
to Jump and Spin on In-Line Skates to read this chapter.)
Axel
(Buy the book How
to Jump and Spin on In-Line Skates to read this chapter.)
Double jumps
(Buy the book How
to Jump and Spin on In-Line Skates to read this chapter.)
Advanced Spins
(Buy the book How
to Jump and Spin on In-Line Skates to read this chapter.)
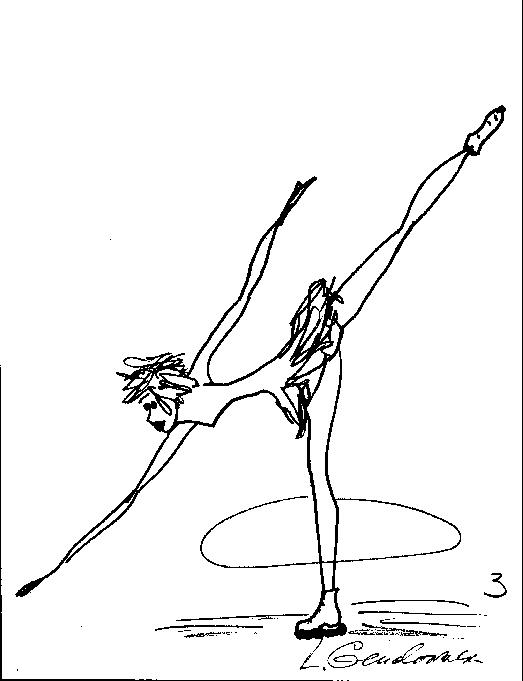
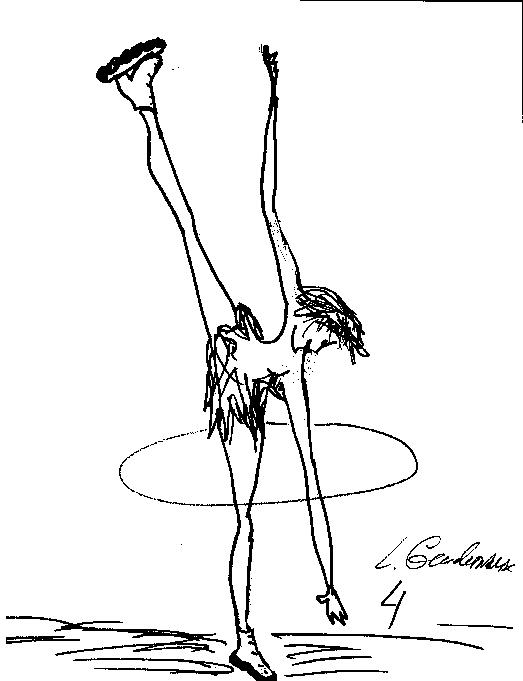
The mini-illusion: Though it sounds like
an amateur magic trick, its actually an aesthetic prelude to practicing
a back camel spin. Reach down quite far toward the floor, and push the
forward inside edge a good distance around before you turn backward to
start doing the back camel spin. If you are flexible enough, your legs
should do a complete split, with your free leg pointing toward the ceiling
or sky and your body vertical, head down and touching your skating foot!
This move impresses everyone and is so easy!
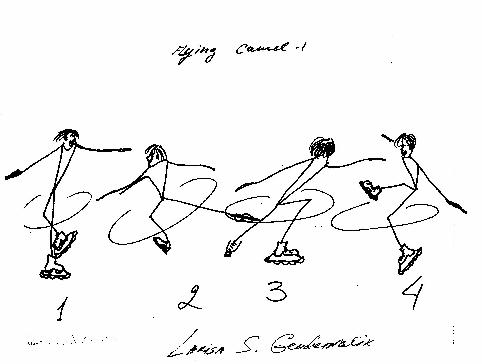
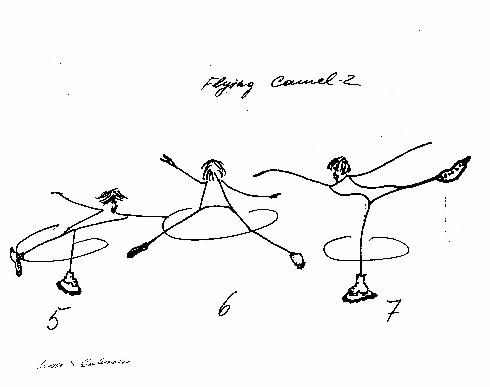
Do a flying camel exactly the way its
done on the ice. The whip effect produced when making a jump seems to make
the back camel spin occur naturally. If you havent done flying camels
on the ice before, its wise to start out at the rail. From there, practice
jumping from your left toe to your right toe, with your free leg parallel
to the top of the rail, as if you are jumping on a table top. Move away
from the rail, and try the actual flying camel. Now, dont say I didnt
warn you, because you
will fall the first time you try it! For control,
reach out to the side a bit when you land. Pull out in the same way you
would in a back camel spin.
A camel-jump-camel is similar to
a flying camel, but you can allow yourself to do a bit of a forward camel
spin before throwing your free leg into the flying part of the camel. This
move should help you get used to doing the flying camel, so work on both
at the same time. Remember to jump with your skating leg. You can get a
mental picture of how it looks by picturing yourself swinging around on
top of your dining room table on your tummy (makes an interesting mental
image, doesnt it?). Thats one you definitely dont want to try at home,
though.
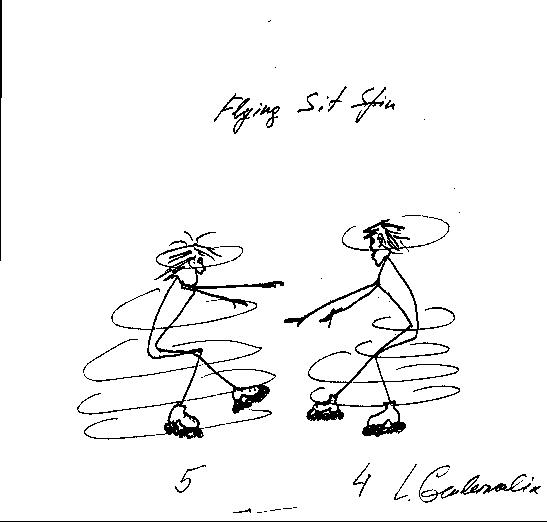
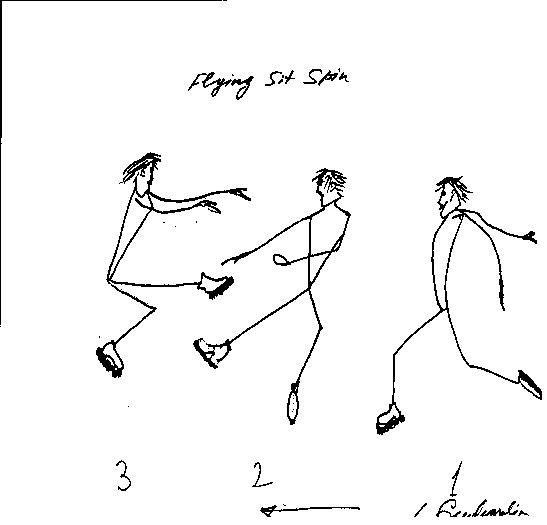
Flying sit spins are fun, look impressive,
and are really not that difficult. Start by entering the spin the same
way you would enter a sit spin, but before you hit the actual sit spin
position, jump up in the air and land on a back inside edge on the same
foot you just used to jump up with and then allow yourself to get into
the actual sit spin position and spin. Youll probably fall, but it wont
hurt since you are already "sitting." Sometimes I just allow myself to
fall on this move and spin around on my rear! Move over, break dancers!
Three Turns
(Buy the book How
to Jump and Spin on In-Line Skates to read this chapter.)
Mohawks
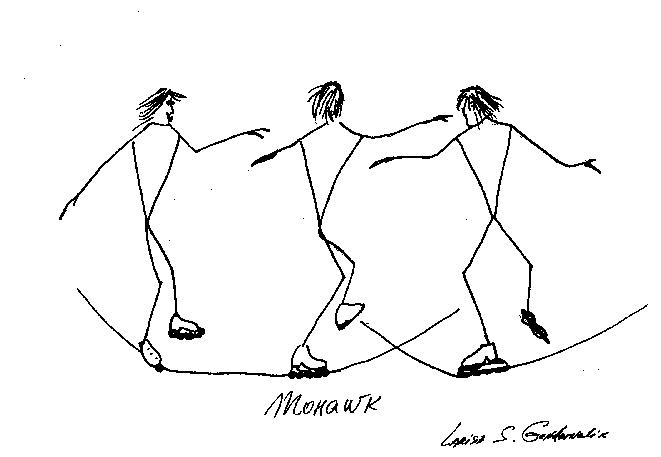
These elegant turns are pure action, with the feel of flight as you
soar a graceful arc across the floor, but remember to practice proper edge
control before you attempt one. The best practice method is short distance
glides on forward inside and backward inside edges. The secret to doing
this type of turn is balance, keeping your weight distributed properly
on your feet. You should feel like you are placing your toes on the ground
as you turn. Of course each skater will have an edge preference; my best
mohawk is the right inside.
To do this turn, begin by gliding on the right inside edge with the
right arm slightly in front, and then bring the left (free) foot to the
inside of the right foot. Place the left toe down, transferring your weight
to the left foot. You should be on your back inside edge with your left
arm checked in front. Keep your body weight to the outside of the circle,
lift up your right hip (which is now the free hip), keep your weight over
the left toes, and check your right arm back.
Footwork
(Buy the book How
to Jump and Spin on In-Line Skates to read this chapter.)
Edges and figures
(Buy the book How
to Jump and Spin on In-Line Skates to read this chapter.)
Stroking
(Buy the book How
to Jump and Spin on In-Line Skates to read this chapter.)
Back Crossovers
Back crossovers are not difficult and are an excellent aerobic footwork
exercise because you get more workout per motion. They are done much like
cross pulls; that is, each skate pushes and pulls. If starting counterclockwise,
put the skates on a circle. Your skate on the inside of the circle should
be on an outside edge, and the other skate should be on an inside edge.
Now, starting with the left skate, make a "D" from toe to heel, sort of
a half circle, keeping both blades on the ground. Thats how you get the
"push." Let that "D" pull over your right skate as you push your right
skate under. Lift the right skate as you return the feet to a parallel
position, then repeat the cross pull motion. Theres no wasted motion;
like bicycling with toe clips on your pedals, you get a lot of extra power
because you are both pulling and pushing!
It wont hurt to add a quick reminder at this point. Like almost every
other maneuver, these depend on consistent outside and inside edges. Part
of the recipe for that is balance; in this case, staying back over the
skate will help keep your speed up. Round out your practice by doing crossovers
in all directions. Ever notice that crabs have one big claw and one little
claw? Dont allow yourself to get trapped into having to go one way only.
Also, remember that in-line skates do have edges. You will find that when
you can actually turn the blade over you will have more control and more
security as you skate.
Forward crossovers
(Buy the book How
to Jump and Spin on In-Line Skates to read this chapter.)
Stops
Sometimes its the little things that get overlooked. Imagine performing
a textbook-perfect Bauer spiral waltz jump sequence, then scuffing off
speed in an out-of-control sideways skid that ends in a wall collision,
complete with the booming sound of heavy skates crashing into the plywoodkablamright
in front of the spectator stand. Not a pretty picture to leave them with.
Ill guarantee they probably wont remember the perfect combo you pulled
off, because the last image in their minds was that embarrassing hog-on-ice
finale. When it comes to achieving that graceful look youre after, stops
are just as important as any other element. You want to fool those who
watch you skate into thinking that the stop is just part of an entire picture.
Drag T-stop
The drag T-stop looks nice. Of course
its impossible to stop on an outside edge as you would on the ice, but
on in-line skates, actually dragging the inside edge is a perfectly acceptable
technique. If you desire, you can even stand in a nice "T" with the skates
pressing on the outside edges after youve stopped, which definitely impresses
spectators! I also find the drag toe-stop
useful.
Of course, you must have a PIC® or toe stop to do this move.
Instead of allowing your wheels to drag behind you as you stop, let the
PIC®
or toe stop drag as you bend forward. Both the drag T-stop and drag toe-stop
feel so odd to ice skaters since neither of these stops is considered acceptable
on ice. Using the toe stop on quad roller skates is standard, so dont
hesitate to use your PIC® or toe stop when you in-line skate.
DRAG TOE-stop
A hockey stop is also graceful and presentable.
Heres how you do it: With your feet parallel, turn to the left. You will
want to push the right skate forward on an inside edge, in a small arc,
as you turn 90 degrees; your left foot will make a MUCH smaller arc, almost
a 90-degree twist. Leave the arms out to the sides and dont move them
as you turn. Once stopped, pose and look straight forward and put some
weight over your front skate. With practice, youll look as good as an
ice hockey player doing a hockey stop!
Setting a Program to Music
(Buy the book How
to Jump and Spin on In-Line Skates to read this chapter.)
Conclusion
In conclusion: Enjoy yourself. The explosion of technology has
opened up all kinds of possibilities that simply were not available in
the past. Never before has roller skating gotten this close to matching
the elegance and the true feel of ice skating. Nevertheless, in-line artistic
skating is a totally unique sport that awaits you with its own set of challenges
and achievements. This is such a new sport; fresh competitors are already
stretching the envelope with original creative performances; new competitions
are opening up all the time.
You can enjoy artistic in-line skating almost anywhere: parks, outdoor
skate parks, roller rinks, school gymnasiums and playgrounds--almost any
level, smooth surface becomes an instant practice site (use your helmet
and safety gear). Impress your friends and enjoy the challenge of being
able to jump and spin on in-line skates. Have fun and Happy Skating!
Glossary of Basic Skating Terms
(Buy the book How
to Jump and Spin on In-Line Skates to read this chapter.)
How to Figure Out Which Way
You Jump or Spin
(Buy the book How
to Jump and Spin on In-Line Skates to read this chapter.)
Where to Purchase the PIC®
Frame Skate and Related Products
The PIC® Skate Company - P.O. Box 219 - Malden, MA 02148
- U.S.A. - (800) 882-3448
Fax: (781) 324-4449
Web site: http://www.picskate.com
Rainbo Sports Shop, 4836 N. Clark Street, Chicago, IL 60640 (800) 752-8370
Or ask your local dealer for the PIC® Skate or PIC®
Skate products.

What Is a GYM SKATE Program?
It is a program designed to provide instruction to students (grade levels
K-12) on the basic skating skills in a gym setting at a nominal cost. The
equipment used is a PIC® Rental Skate. This is an in-line skate
designed to duplicate ice skates. It is safe, highly maneuverable, and
easy to skate on. The skate is gym floor safe.
The Gym Skate Program provides:
1. Use of equipment for 5 or 10 days.
2. A curriculum and teachers guide.
3. Delivery and pick up of equipment.
4. Free use of skates for teachers and staff.
5. Skate instructors are available at a modest fee to aid the physical
education staff.
The PIC® Skate Company
P.O. Box 219
Malden, MA 02148 U.S.A
(800) 882-3448:
E-mail: sales@picskate.com
Where to Get Information
on Artistic In-line Skating Competitions
USA Roller Skating
4730 South Street
P.O. Box 6579
Lincoln, NE 68506
(402) 483-7551
FAX: (402) 483-1465
Join the International In-Line Figure
Skating Association!
The International Inline Figure Skating
Association (IIFSA) was formed in 2000.
The purpose of the IIFSA is to promote the wonderful new sport of in-line
figure skating so that everyone can experience the joy of jumping and spinning
on in-line skates.
Membership in the International Inline Figure Skating Association is
free--to join, just join their mailing list! To join, go to http://www.onelist.com/group/jumpspin
.
That's all there is too it!
For more information write to jumpspin@iifsa.com.
About the Author

Jo Ann Schneider Farris began ice skating
in 1964. In 1975, she won a silver medal in the United States National
Figure Skating Championships and became a United States Figure Skating
Association Gold Medallist in 1976. In 1983, she began her career as an
ice skating coach, and has trained skaters of all ages and levels. When
in-line skates came out in the early 1980s, Jo Ann and her husband, Dan,
were among the first to buy the original Rollerblades, and they enjoyed
all the attention the skates attracted when they skated on them in the
streets, beaches and parks in California. In 1995, the PIC®
Frame Skate was developed, and Jo Ann was one of the first to buy the product.
She has spent the last few years working on learning to re-create everything
she can do on the ice on the in-line skate.
She lives in Colorado Springs, Colorado with her husband and three children,
Joel, Rebekah, and Annabelle. She teaches both ice and in-line skating,
and directs and coordinates skating programs at both the Ice Arena at Chapel
Hills Mall and at Honnen Ice Rink at Colorado College. Jo Ann is a graduate
of Colorado College, and holds a California Multiple Subject Teaching Credential
from California State University at Long Beach.
When Jo Ann is not coaching skating or jumping and spinning on her PIC®
Frame Skates, she enjoys cross-country skiing, swimming, creating web sites,
playing hockey with her son Joel, in-line skating outdoors with her family,
and playing and singing with her husband and children.
About Marion Ennis Curtis
Marion Ennis Curtis is a USFSA Double Silver Medallist. She has taught
figure skating since 1979 and is a registered PIC® Frame in-line coach.
Marion, who lives with her husband Bruce and two skating children, holds
a California Multiple Subject Teaching Credential and currently coaches
both in-line and quad skating in Morro Bay, California.
About Larisa Gendernalik

Larisa Gendernalik began skating in Saint Petersburg (Leningrad), Russia,
and competed in the National Championships in Russia. In 1979, three years
after graduating from the Academy of Sport Science and Physical Education
with a B.S. degree, she started teaching in the United States. She is Master
Rated by the Professional Skaters Association, and teaches figures, freestyle,
field moves, and choreography, and also arranges music for skaters. Larisa
was on staff at the world famous Broadmoor World Arena for eight and a
half years, and has trained many national competitors. She began drawing
at a young age in Russia, and completed several art courses there. Larisa
loves dramatic theater, music, ballet, and art, and she loves to ski. She
now lives in Colorado Springs, Colorado with her husband and two children,
Valerie and Alex, and her two dogs, Bazil and Forrest.

